Introduction
Effective communication is the backbone of any successful relationship, and this holds true for the relationship between you and your cleaner. Whether you’re hiring a cleaning service for a one-time deep clean or a regular housekeeping arrangement, establishing clear communication can significantly enhance the quality of service you receive. A well-structured checklist acts as a powerful tool to bridge any gaps and ensure that all tasks are completed to your satisfaction. In this article, we’ll delve deep into Creating Checklists for Effective Communication with Your Cleaner, exploring various strategies, tips, and insights to make your interactions with cleaning professionals much smoother.
Why Use Checklists When Communicating with Your Cleaner?
The Importance of Clear Instructions
When it comes to hiring a cleaning service, clarity is key. A checklist allows you to outline specific tasks that need to be done, ensuring there’s no room for ambiguity.
Benefits of Using Checklists:
Consistency: Ensures that every cleaning visit meets your standards. Time-Saving: Reduces time spent on back-and-forth communications. Expectation Management: Helps cleaners understand what is expected from them right away.Reducing Misunderstandings
Miscommunication can lead to frustrating experiences for both you and your cleaner. A checklist minimizes this risk by providing concrete guidelines.
How Does This Help?
- It allows cleaners to refer back to the checklist if they have questions about specific tasks. It provides a clear record of what has been agreed upon.
Creating Your First Cleaning Checklist
Identify Your Cleaning Needs
Before you create a checklist, assess what areas in your home require attention. Different households have different needs!
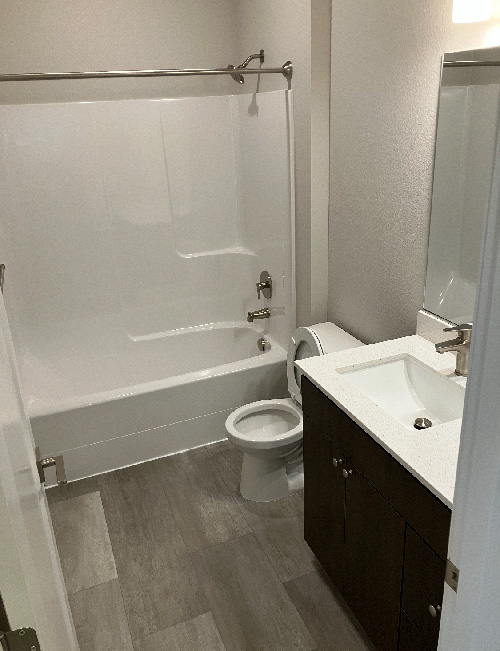
Common Areas to Include:
- Living Room Kitchen Bathrooms Bedrooms Hallways
Breaking Down Each Area Into Tasks
Once you've identified the areas, break them down into specific tasks that need to be performed in each space.
Example Breakdown:
| Area | Tasks | |---------------|--------------------------------------------| | Living Room | Dust furniture, vacuum carpets, clean windows | | Kitchen | Wipe down counters, mop floors, clean appliances | | Bathrooms | Scrub toilets, wipe mirrors, disinfect sinks | | Bedrooms | Change bed linens, dust shelves, vacuum floors |
Prioritizing Tasks Based on Frequency
Some tasks need more frequent attention than others. Creating a priority list can help communicate which tasks are urgent.
Prioritization Tips:
- Daily tasks (e.g., kitchen cleanup) Weekly tasks (e.g., bathroom scrubbing) Monthly tasks (e.g., deep cleaning carpets)
Communicating Your Checklist Effectively
Sharing the Checklist with Your Cleaner
Once you've created your checklist, it's important to share it effectively with your cleaner.
Methods of Sharing:
Printed Copy Email Mobile Apps (like Google Keep or Trello)Using Visuals in Your Checklist
Sometimes words aren’t enough! Including visuals can enhance understanding.
What Types of Visuals Work Best?
- Diagrams showing room layouts Photos demonstrating specific cleaning techniques
Adjusting the Checklist Over Time
Feedback Loop with Your Cleaner
Communication should be two-way! Encourage feedback from your cleaner regarding the checklist.
Why Feedback Matters:
It helps improve future checklists based on practical experiences and challenges faced during cleaning sessions.
Updating The Checklist Regularly
As your needs change over time—whether due to seasonal changes or life events—make sure to adjust your checklist accordingly.
Common Mistakes When Creating Checklists for Cleaners
Being Too Vague or Overly Detailed?
Striking a balance is essential! If your checklist is too vague, it may lead to confusion; if it’s overly detailed, it might overwhelm the cleaner.
Finding The Right Balance:
Aim for clarity while keeping instructions straightforward and manageable.
Neglecting Special Instructions or Preferences
Do you have certain preferences regarding cleaning products or methods? Make sure these are included in your checklist!
Example:
“Please use eco-friendly products only.”

Frequently Asked Questions (FAQs)
1. What should I include in my cleaning checklist?
Your checklist should include specific areas that need cleaning along with detailed tasks like dusting surfaces or mopping floors.
2. How often should I update my checklist?
It's best to review and update your checklist periodically or whenever there’s a change in needs—like seasonal cleaning requirements.
3. Can I ask my cleaner for suggestions on my checklist?
Absolutely! Cleaners often have valuable insights based on their experience that can enhance the effectiveness of your checklist.
4. Should I use checklists if I have different cleaners coming regularly?
Yes! A consistent checklist will help maintain continuity in service even when different cleaners are assigned to your home.
5. What if my cleaner doesn’t follow the checklist?
If this happens consistently, consider discussing it openly with them or revisiting how the instructions are presented in the checklist.
6. Is it necessary to create an exhaustive list?
While having detail is good for clarity, Cleaning Service Tigard keep it practical—focus on priorities rather than overwhelming details that could lead to confusion!
Conclusion
In summary, effective communication through well-crafted checklists is essential when working with a cleaning service. By outlining clear expectations and breaking down tasks into manageable steps, you're not just enhancing the quality of work but also fostering a productive relationship with your cleaner. Remember that this process requires ongoing communication and adjustments as needed; don’t hesitate to revisit and refine those checklists over time!
By embracing these practices outlined in “Creating Checklists for Effective Communication with Your Cleaner”, you'll find yourself enjoying not only a sparkling clean home but also peace of mind knowing everything was addressed just as you wanted it!